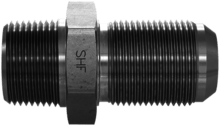
JIC fitting


JIC fittings, defined by the SAE J514 and MIL-F-18866 standards, are a type of flare fitting machined with a 37-degree flare seating surface. JIC (Joint Industry Council) fittings are widely used in fuel delivery and fluid power applications, especially where high pressure (up to 10,000 psi) is involved. The SAE J514 standard replaces the MS16142 military specification, although some tooling is still listed under MS16142. JIC fittings are dimensionally identical to AN (Army-Navy) fittings, but are produced to less exacting tolerances and are generally less costly. SAE 45-degree flare fittings are similar in appearance, but are not interchangeable, though dash sizes 2, 3, 4, 5, 8, 10, 14, and 16 share the same thread size. Some couplings may have dual machined seats for both 37-degree and 45-degree flare seats. Komatsu and JIS (Japanese Industrial Standard) fittings have flare ends similar to JIC fittings. Komatsu and JIS both use a 30-degree flare seating surface. The only difference is Komatsu uses milimeter thread sizes while JIS use a BSP (British Standard Pipe) thread. JIC fitting systems have three components that make a tubing assembly: fitting, flare nut, and sleeve. As with other flared connection systems, the seal is achieved through metal-to-metal contact between the finished surface of the fitting nose and the inside diameter of the flared tubing. The sleeve is used to evenly distribute the compressive forces of the flare nut to the flared end of the tube. Materials commonly used to fabricate JIC fittings include forged carbon steel, forged stainless steel, forged brass, machined brass, Monel and nickel-copper alloys.
JIC fitting are commonly used in the Fluid Power industry in a diagnostic and test-point setting. A three way JIC coupling provides a port inline of circuit in which a user can connect a measurement or diagnostic device to take pressure readings and perform circuit and system diagnostics.
References
External links
| Size Designation | Taper width, "A", inches | Thread width, "B", inches | Thread Spec. "C" | Shoulder width, "D" inches | Shoulder Diameter, "E", inches | Fitting Length, "F", inches | Bore Diameter, "H", inches | Tip Diameter, "I", inches |
|---|---|---|---|---|---|---|---|---|
| 2 | 0.111 | 0.208 | 5/16” - 24 UNF | 0.067 | 0.250 | 0.448 | 0.062 | 0.083 |
| 3 | 0.11 | 0.239 | 3/8” - 24 UNF | 0.067 | 0.312 | 0.479 | 0.125 | 0.146 |
| 4 | 0.114 | 0.282 | 7/16” – 20 UNF | 0.080 | 0.364 | 0.550 | 0.172 | 0.193 |
| 5 | 0.114 | 0.282 | 1/2” - 20 UNF | 0.080 | 0.426 | 0.550 | 0.234 | 0.255 |
| 6 | 0.108 | 0.275 | 9/16" – 18 UNF | 0.090 | 0.481 | 0.556 | 0.281 | 0.318 |
| 7 | -- | -- | -- | -- | -- | -- | -- | -- |
| 8 | 0.155 | 0.310 | 3/4” - 16 UNF | 0.098 | 0.659 | 0.657 | 0.406 | 0.426 |
| 9 | -- | -- | -- | -- | -- | -- | -- | -- |
| 10 | 0.155 | 0.385 | 7/8” - 14 UNF | 0.111 | 0.772 | 0.758 | 0.531 | 0.539 |
| 11 | -- | -- | -- | -- | -- | -- | -- | -- |
| 12 | 0.185 | 0.424 | 1-1/16” - 12 UNF | 0.130 | 0.943 | 0.943 | 0.609 | 0.664 |
| 13 | -- | -- | -- | -- | -- | -- | -- | -- |
| 14 | 0.186 | 0.450 | 1-3/16" – 12 UN | 0.129 | 1.068 | 0.890 | 0.719 | 0.788 |
| 15 | -- | -- | -- | -- | -- | -- | -- | -- |
| 16 | 0.186 | 0.471 | 1-5/16" – 12 UN | 0.129 | 1.193 | 0.911 | 0.844 | 0.913 |
| 17 | -- | -- | -- | -- | -- | -- | -- | -- |
| 18 | -- | -- | -- | -- | -- | -- | -- | -- |
| 19 | -- | -- | -- | -- | -- | -- | -- | -- |
| 20 | -- | -- | 1-5/8” – 12 UN | -- | -- | 0.96 | 1.078 | -- |